How is glass blown? Purchasing quartz sand
The art of glass blowing is a complex, painstaking process. A similar technique dates back to the first century BC, it appeared in Sidon (now coastal Lebanon).
The art of glass blowing is a complex, painstaking process. A similar technique dates back to the first century BC, it appeared in Sidon (now coastal Lebanon). From there the art spread to the Roman Empire and then to other parts of the world. The art of glass blowing is still practiced today and involves mastering a host of complex techniques. The most important thing in the work of glassblowers is to perform the work with a high level of precision and accuracy.
The process begins when a 4-5 pound tube enters the kiln where the glass is melted at 2200 degrees Fahrenheit (the temperature of lava).

This process is called collection. Once collected, glassblowers dip a blowpipe into hot glass until a decent-sized droplet is concentrated at the end. This is a very tricky part because the glass has the consistency of honey and drips easily from the end of the pipe.

In the next step, the glass blower begins to blow air into the pipe, creating a small air bubble inside the molten glass. This is a very delicate process: if the artist blows too intensely, then his work will fail.

One of the most difficult aspects of blowing is maintaining the temperature at the required level. By maintaining the temperature, the artist can shape the glass into the shape he has in mind. Thanks to the traditions passed on by glassblowers from generation to generation, this art never ceases to attract and captivate our attention.
I have always believed that blowing glass products is a complex industrial production. But it turns out that it can be organized in a large city apartment or, most definitely, in a country house. There would be plenty of electricity. It was from the apartment that I started your creativity with glass Egor Komarovsky. Egor is an enthusiast, self-taught, very proactive and creative person. Recently I was able to visit it glassblowing workshop "Steklou" and watch how a vase is blown out of a drop of glass.
In general, Egor Komarovsky was originally trained as an international logistician, but he did not stay in office work for long, preferring it to creative work. I started with blacksmiths, and then turned my attention to glass. In a rented apartment, he and his wife began to heat the village, wrap it in foil and study it in every possible way, trying to figure it out. Then they began to engage in glass fusing - this is the fusion of glasses with each other and then the finished product is sintered through a mold (For example). We also worked on stained glass. Both productions are now more or less widespread and competitive on the market.
2
But on the contrary, few people do glass blowing. There were many glassblowing industries in the Union, but almost all of them closed, there are almost no private workshops. There is one institution in Moscow, the Mukhinsky School in St. Petersburg, but none of them took Yegor either as a student or as a worker, fearing imaginary competition. All of them employ mostly “old staff” 60+, with almost no young specialists.
3
I only managed to work a little on personal agreements with individual masters. This, plus theoretical study of the issue, is a blessing on the Internet(but not in Runet) Now a lot of information, as well as my own practice, have allowed me to master the technique. The chosen strategy also commands respect - to take on a manufacturing order work that is a little more complex than what was done before. The advance payment is taken, motivation increases - whether you like it or not, you need to do it. Sometimes it was necessary to redo the product 15 times before a satisfactory result was achieved.
4
While abroad this direction is very widespread and even popularized. They make home glass melting furnaces, train everyone - you can easily organize a home mini-production. Komarovsky had to make his own stoves himself (buying foreign ones is very expensive).
5
In total, three ovens with different temperatures are required for production. All of them are electric, 6 kilowatts each. There is also another gas cuckoo oven for heating the material during the molding process.
6
The workshop is full of all sorts of colorful and shiny beauties. And there are literally tons of vases here.
7
This is the kind of vase that will now be blown out of a drop of glass.
8
The glass itself is also of American origin - special for blowing. We don’t produce this kind of stuff here, but large factories brew glass for themselves. Colored glass is ordered in the form of plates, and transparent glass in the form of drops like these. Drops are easier to work with.
9
First, the glass is melted in a ceramic pot at a temperature of 1600 degrees.
10
Lower the glass blowing tube and remove from the furnace everything that has stuck to the end of the tube. Blow out a little. A glass blowing tube, or blowing tube, is a hollow tube about 1.5 meters long with a brass mouthpiece.
11
And they roll it to form the required shape. Forming stage.
12
The glass is periodically heated in a “cuckoo” so that it retains its elasticity. Glass begins to soften at 650 degrees and above.
13
Next, we lower the tube into the glass again, stick new glass on it, blow it, and shape it. This is the so-called free blowing technique. In addition to this, there are other methods
14
At a certain point, we stick strips of colored glass onto the workpiece. They were pre-prepared - they took strips of colored glass and sintered them together into one plate. First, we stuck the platinum onto the workpiece.
15
Additionally, the parts were baked in a “cuckoo”.
16
And now we carefully shape it by bending the sides.
17
18
19
And then all the same stages - blowing, molding, heating, etc. Sometimes, however, it is necessary to slightly cool the workpiece using a dampened newspaper. It is necessary to strictly maintain the temperature balance, as well as constantly monitor the dimensions, wall thickness, and quality. A troublesome task that requires good skills.
20
When the lights are turned off, the workshop appears in a beautiful fairy-tale form. .
21
Forming is also done using gravity. They tilted it to one side - the workpiece began to deform downwards, the glass flowed down.
22
23
24
When the vase has “grown” almost to the required size, the workpiece is once again dipped in liquid glass to form a transparent protective layer under stress.
25
After about 1.5 hours, the vase is almost ready. Now take another glass blowing tube, dip it into glass and solder it to the vase from the opposite end. The old tube is removed, and in its place the neck of the phase begins to form. The glass is soft, so we use tweezers to widen the hole, bend the edges and give it the desired shape.
26
This is how it turned out, only after cooling the colors will be different. White will remain white, blue will become azure, and red will become yellow.
27
And the last stage is cooling, or annealing - also a very important process. The thicker the glass, the longer it needs to be cooled. Centimeter-sized products are cooled for days and even months. For these vases, approximately 12 hours is enough. Below 517 degrees, stresses begin to arise in the glass and up to 370 degrees you need to cool very slowly and carefully, then the cooling rate increases slightly. After annealing, the vase will need to be sanded and everything will be ready.
The good news for everyone is that Egor Komarovsky Having faced all the difficulties of learning the craft, I decided to change the situation and is already conducting courses and master classes for everyone to learn how to blow glass. There are also excursions for schoolchildren. 2 hours of classes cost 4,000 rubles and during this time you will be able to understand whether it is interesting to you or not. If “yes,” then you can continue your studies, and then come and make some products for yourself (if you think that you don’t need your own workshop). In general, there are big plans for education - soon the production will move to a new site, where it will be possible to conduct larger excursions and master classes. Egor also consults with many glassblowers at other industries, preferring not to make the required product himself, but to show how it is done, train them, and then they can do it on their own. That is, Komarovsky took upon himself a very large and grateful mission of education and training, which, given the shortage of masters and information in Russia now, cannot but arouse great respect.
As usual, thank you spbblog
in the face Zhenya
for invitation.
Other stories and photographs can be read and viewed from Zhenya
Katerina
,
Today we will talk about how to make glass with your own hands at home. We will also consider methods and technologies for self-manufacturing of glass and glass products, namely furnaces, devices and tools for melting glass.
At factories and in chemical laboratories, glasses are obtained from a mixture - a thoroughly mixed dry mixture of powdered salts, oxides and other compounds. When heated in furnaces to very high temperatures, often above 1500°C, salts decompose to oxides, which, interacting with each other, form silicates, borates, phosphates, and other compounds that are stable at high temperatures. Together they make glass.
We will prepare the so-called fusible glasses, for which a laboratory electric furnace with a heating temperature of up to 1000°C is sufficient. You will also need crucibles, crucible tongs (so as not to burn yourself) and a small flat plate, steel or cast iron. First we will weld the glass, and then we will find a use for it.
Mix with a spatula on a sheet of paper 10 g of sodium tetraborate (borax), 20 g of lead oxide and 1.5 g of cobalt oxide, sifted through a sieve. This is our burden. Pour it into a small crucible and compact with a spatula so that you get a cone with a top in the center of the crucible. The compacted mixture should occupy no more than three-quarters of the volume in the crucible, then the glass will not spill.
Place the crucible with tongs in an electric furnace (crucible or muffle), heated to 800–900 °C, and wait until the mixture has melted. This is judged by the release of bubbles: as soon as it has stopped, the glass is ready. Remove the crucible from the oven with tongs and immediately pour the melted glass onto a clean steel or cast iron plate. Cooling on the stove, the glass forms a blue-violet ingot.
To obtain glasses of other colors, replace the cobalt oxide with other coloring oxides. Iron(III) oxide (1-1.5 g) will color the glass brown, copper(II) oxide (0.5-1 g) green, a mixture of 0.3 g of copper oxide with 1 g of cobalt oxide and 1 g iron oxide (III) - black. If you take only boric acid and lead oxide, then the glass will remain colorless and transparent. Experiment yourself with other oxides, such as chromium, manganese, nickel, tin.

Crush the glass with a pestle in a porcelain mortar. In order not to injure yourself with fragments, be sure to wrap your hand with a towel, and cover the mortar with a pestle with a clean rag.
Pour fine glass powder onto thick glass, add a little water and grind to a creamy state with a chime - a glass or porcelain disc with a handle. Instead of a chime, you can take a small flat-bottomed mortar or a polished piece of granite - this is what the old masters did when they rubbed paint. The resulting mass is called slip. We will apply it to the aluminum surface in much the same way as they do when making jewelry.
Clean the aluminum surface with sandpaper and degrease by boiling in a soda solution. On a clean surface, trace the outline of the pattern with a scalpel or needle. Cover the surface with a slip with an ordinary brush, dry it over a flame, and then heat it in the same flame until the glass melts onto the metal. You will get enamel.
If the badge is small, it can be covered with a layer of glass and heated in a flame in its entirety. If the product is larger (say, a plate with an inscription), then it is necessary to break it into sections and apply glass to them one by one. To make the color of the enamel more intense, apply the glass again. In this way, it is possible to obtain not only decorations, but also reliable enamel coatings to protect aluminum parts in various devices and models. Since in this case the enamel carries an additional load, it is desirable to cover the metal surface after degreasing and washing with a dense oxide film; to do this, it is enough to hold the part for 5-10 minutes in an oven with a temperature slightly below 600 ° C.

Of course, it is more convenient to apply slip on a large part not with a brush, but from a spray gun or simply by watering (but the layer should be thin). Dry the part in an oven at 50–60°C, and then transfer it to an electric furnace heated to 700–800°C.
And from low-melting glass, you can prepare painted plates for mosaic work. Pieces of broken porcelain dishes (they will always be given to you in a china shop) pour a thin layer of slip over them, dry them at room temperature or in an oven and melt the glass onto the plates, keeping them in an electric furnace at a temperature of at least 700 ° C.
Having mastered the work with glass, you can help your colleagues from the biological circle: they often make stuffed animals there, and stuffed animals need multi-colored eyes ...
In a steel plate about 1.5 cm thick, drill several recesses of different sizes with a conical or spherical bottom. In the same way as before, fuse the multi-colored glasses. Gamma, perhaps, is enough, and to change the intensity, slightly increase or decrease the content of the coloring additive.
Place a small drop of bright molten glass into the recess of the steel plate, then pour in the iris-colored glass. The drop will enter the main mass, but will not mix with it - this is how both the pupil and the iris will be reproduced. Cool products slowly, avoiding sudden temperature changes. To do this, remove the hardened, but still hot “eyes” from the mold with heated tweezers, put them in loose asbestos and cool it to room temperature already in it. .
Of course, fusible glasses can be found in other applications. But wouldn't it be better if you look for them yourself?
And at the end of the experiments with glass, using the same electric furnace, we will try to turn ordinary glass into colored glass. The natural question is: is it possible to make sunglasses in this way? It is possible, but it is unlikely that you will succeed the first time, because the process is capricious and requires some skills. Therefore, take the glasses only after you have practiced on the pieces of glass and make sure that the result is as expected.
The basis of paint for glass will be rosin. From resinates, acid salts that make up rosin, you previously prepared driers for oil paints. Let us turn again to resinates, because they are able to form a thin, even film on glass and serve as carriers of the coloring matter,
In a solution of caustic soda with a concentration of about 20%, dissolve with stirring and remembering, of course, caution, pieces of rosin until the liquid becomes dark yellow. After filtering, add a little solution of ferric chloride FeCl3 or other ferric salt. Keep in mind that the concentration of the solution should be small, salt should not be taken in excess - the precipitate of iron hydroxide, which in this case forms, will interfere with us. If the salt concentration is low, then a red precipitate of iron resinate is formed - it is there that is needed.
Filter off the red precipitate and dry it in air, and then dissolve to saturation in pure gasoline (not automobile, but solvent gasoline), it would be even better to use hexane or petroleum ether. Paint the glass surface with a thin layer with a brush or spray gun, let it dry and place it in an oven heated to about 600 ° C for 5-10 minutes.

But rosin belongs to organic substances, and they cannot withstand such a temperature! That's right, but that's exactly what you need - let the organic base burn out. Then the thinnest film of iron oxide will remain on the glass, well adhered to the surface. And although the oxide is generally opaque, in such a thin layer it transmits part of the light rays, that is, it can serve as a light filter.
Perhaps the light protection layer will seem too dark or, on the contrary, too light. In this case, vary the conditions of the experiment - slightly increase or decrease the concentration of the rosin solution, change the firing time and temperature. If you are not satisfied with the color in which the glass is painted, replace the iron chloride with another metal chloride, but certainly one whose oxide is brightly colored, such as copper or cobalt chloride.
And when the technology is carefully worked out on pieces of glass, it is possible to make the transformation of ordinary glasses into sunglasses without much risk. Just remember to remove the glass from the frame - the plastic frame will not withstand the heat in the oven in the same way as the rosin base ...
.
To get glass, sand must be melted. You must have walked on hot sand on a sunny day, so you can guess that for this it needs to be heated to very high temperatures. An ice cube melts at a temperature of about 0 C. Sand begins to melt at a temperature of at least 1710 C, which is almost seven times the maximum temperature of our usual oven.
Heating any substance to such a temperature requires a lot of energy and, consequently, money. For this reason, in the production of glass for everyday use, glassmakers add a substance to the sand that helps the sand melt at lower temperatures - about 815 C. Usually this substance is soda ash.
However, if only a mixture of sand and soda ash is used in the melt, an amazing type of glass can be obtained - glass that dissolves in water (frankly, not the best choice for glasses).

To prevent the glass from dissolving, a third substance must be added. Glass makers add crushed limestone to sand and soda (you must have seen this beautiful white stone).
The glass commonly used to make windows, mirrors, glasses, bottles, and light bulbs is called soda-lime silicate. Such glass is very durable, and in molten form it is easy to give it the desired shape. In addition to sand, soda ash and limestone, this mixture (experts say "mixture") includes a little magnesium oxide, aluminum oxide, boric acid, as well as substances that prevent the formation of air bubbles in this mixture.
All these ingredients are combined and the mixture (the mixture is placed in a giant furnace (the largest of these furnaces can hold almost 1,110,000 kg of liquid glass). .
The strong fire of the furnace heats the mixture until it begins to melt and turns from a solid to a viscous liquid. Liquid glass continues to be heated at high temperatures until all bubbles and veins disappear from it, since the thing made from it must be absolutely transparent. When the mass of glass becomes homogeneous and clean, the fire is reduced and the glass is waited until the glass turns into a viscous viscous mass - like a hot toffee. The glass is then poured from the furnace into a casting machine where it is poured into molds and shaped.
However, in the production of hollow things, such as bottles, the glass has to be blown like a balloon. Previously, glass blowing could be seen during fairs and carnivals, now this process is often shown on TV. You've probably seen glassblowers blowing a piece of hot glass hanging from the end of a tube to create amazing figurines. But you can also blow glass with the help of machines. The basic principle of glassblowers is to blow into a glass drop until an air bubble forms in the middle, which becomes a cavity in the finished thing.

After the glass has been given the necessary shape, a new danger lies in wait for it - it can crack when cooled to room temperature. To avoid this, craftsmen try to control the cooling process by subjecting the hardening glass to heat treatment. The last stage of processing is removing excess glass droplets from the handles of cups or polishing plates with special chemicals that make them perfectly smooth.
Scientists are still arguing whether glass should be considered a solid or a very viscous (syrup-like) liquid. Since the windows of old houses are thicker at the bottom and thinner at the top, some claim that the glass runs down over time. However, one can object to this that earlier window panes were not made perfectly even and people simply inserted them into the frames with a thicker edge down. Even glassware from ancient Roman times shows no signs of "fluidity". Thus, the old window glass example does not help resolve the question of whether glass is in fact a highly viscous liquid.
Composition (raw materials) for glass production at home:
Quartz sand;
soda ash;
Talamit;
Limestone;
Nepheline syenite;
Sodium sulfate.
How glass is made at home (production process)
Usually scrap glass (broken glass) plus the above components are used as ingredients.
1) The constituent elements of the future glass enter the furnace, where it all melts at a temperature of 1500 degrees, forming a homogeneous liquid mass.
2) Liquid glass enters the homogenizer (an apparatus for creating stable mixtures), where it is mixed to a mass with a uniform temperature.
3) The hot mass is allowed to settle for several hours.
This is how glass is made!
The art of glass blowing is a complex, painstaking process. A similar technique dates back to the first century BC, it appeared in Sidon (now coastal Lebanon). From there the art spread to the Roman Empire and then to other parts of the world. The art of glass blowing is still practiced today and involves mastering a host of complex techniques. The most important thing in the work of glassblowers is to perform the work with a high level of precision and accuracy.
The process begins when a 4-5 pound tube enters the kiln where the glass is melted at 2200 degrees Fahrenheit (the temperature of lava).

This process is called collection. Once collected, glassblowers dip a blowpipe into hot glass until a decent-sized droplet is concentrated at the end. This is a very tricky part because the glass has the consistency of honey and drips easily from the end of the pipe.

In the next step, the glass blower begins to blow air into the pipe, creating a small air bubble inside the molten glass. This is a very delicate process: if the artist blows too intensely, then his work will fail.

One of the most difficult aspects of blowing is maintaining the temperature at the required level. By maintaining the temperature, the artist can shape the glass into the shape he has in mind. Thanks to the traditions passed on by glassblowers from generation to generation, this art never ceases to attract and captivate our attention.
I visited various workshops and factories, saw how jam and metal are made, saw how they catch fish on an industrial scale, and how hemp is tested, and yesterday I visited an amazing place - an art glass workshop. Egor, a master glassblower, gave Petrograd community bloggers a tour of his workshop, where he creates wonderful and beautiful things from scratch that anyone can make under his guidance.
1. A complete scam!
Our acquaintance with Yegor began with a short introductory word from the master. He told us that he was self-taught, he learned from videos from the Internet, there was no domestic literature on glass as such, so he had to study Western literature. Communication with Russian masters from the Stieglitz Academy, for example, also did not work out, because... Those old guys believe that if they hire him to work or study with them, he will learn all the secrets of the craft from them and run off to create his own company, thereby creating competition for them. As a result, Egor did not fold his arms and go to the West, as many could have done, but having received several practical lessons from an art university teacher, he then began to create with his own hands, creating 3 furnaces and preparing all the necessary base.
2. The base is glass, of course. Egor buys American goods because... There are plenty of flowers, it’s of high quality, but in Russia everything is bad with this raw material, it’s not enough and you can’t get it. Glass is purchased either in the form of similar sheets or plates, or in the form of cubes, which in principle is the same, because everything is melted in the furnace.
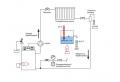
3. Ovens are perhaps the most important component of the process. There should be at least three of them: a glass melting room, in which the temperature is maintained at ~1100 degrees Celsius, a furnace for heating workpieces, and an oven for cooling finished products.
4. All 3 ovens are electric, adjustable with this simple panel. By the way, the workshop is located in the building of the Union of Artists, and it’s cool. In addition to this glass workshop, there are others there.
5. The “cuckoo” stove got its name from the sliding doors that resemble a birdhouse))
6. The temperature there is decent, the oven is used to heat the product during operation. You can’t get inside, it’s hot, but Egor said that he and his friends stuck an action camera in there, wrapped it in cooling rags, and took some cool photos. Fire!
7. Actually, a long blowing tube, with the help of which the whole miracle happens.
8. Liquid glass is taken from the glass melting furnace by a tube and the process of creating a blank for the product begins. In our case, it's a vase!
9. Only a small amount of glass is taken, because there is simply no need for it in large quantities.
10. Then you need to bring the blank along the metal surface to the desired shape.
11. Glass is hot, and that means you can do whatever you want with it, including inflate!
12. Once again we dip the workpiece into the furnace and grab an additional amount of liquid glass, it is needed in order to subsequently move to the next furnace, in which all the action will take place.
13. Egor moves on to the “Cuckoo”, in which glass is blown and maintained in the required shape.
14. For now, this is just a blank for a vase, that is, transparent glass, onto which a layer of colored glass will later be applied.
15. Blowing continues until it becomes clear that the blank is ready.
16. Then, when the blank is completely ready, you get any colored glass to your own taste, in our case it is a 4-color blank from which the vase will be created. As you can see, our blank is literally stuck to the multi-colored workpiece and is already going into the oven.
17. In order for the blank and the blank to take the desired shape, they need to be united, as it were, by bending the molten glass around the blank.
18. Bent it, now you need to use dental tweezers or any other suitable tool to connect the edges of the workpiece to each other.
19. This is done several times by sending the product into the oven, then bending and joining the edges again, until it becomes clear that the blank and the colored blank are one!
20. Using antique scissors, Egor creates the bottom of the vase, as if squeezing the glass.
21. What next? Then you need to blow and melt for a long time and persistently until you understand that the wall thickness is already required. By the way, as you can see, the stove is on gas. One such cylinder lasts for 1.5 days on average. Due to the fact that the room is small, there is no way to store gas here, so every couple of days you have to refuel at the nearest gas station.
22. Molding is when a product is given the desired shape with wet newspaper. The frozen glass spins on the newspaper, cools, and at the same time takes on the required shape.
23. With some other dental instrument, Yegor applies a pattern to the vase, which we will see soon)
24. Once again, we need to dip our product into a glass melting furnace to apply a layer of glass, to give it gloss, as well as for strength.
25. And again molding. In general, the process is clear and simple - blow, twist, shape, cool. But at the same time, all this is very difficult, and requires care and experience, which you gain by making mistakes and achieving results. As in everything, however. Creative and interesting work, it’s not for nothing that Yegor stopped being an office plankton and began working with his hands, it’s cool.
26. Here the product, already with the additional layer of glass that we recently applied, is sent back to the oven.
27. It seems that the master realized that it was time to pull out the product. This is done in a rather cunning way - the tube, with the product at the end, quickly rotates around its axis, making several revolutions, thereby stretching to the desired size.
28. Then, to make the neck of the vase, you need to attach something like this to the bottom (on the left) so that there is something to hold the product by.
29. Meanwhile, on the other hand, the future neck of the vase is created with tongs, as if simply expanding it while the glass is liquid.
30. Go into the oven a few more times, then expand again, and voila, the elegant neck of the vase is ready!
31. The master and his product. In fact, red is yellow, and pale blue is a color closer to blue. When the product cools, it will take on the proper colors.
32. It’s time to cut off that thing from the bottom of the product; we no longer need it.
33. After all, the product is sent to an oven in which the temperature is maintained for a long time at +517 degrees, and then lower, lower, lower, this is necessary so that the glass gradually cools, otherwise it will simply crack and at this point the product will cease to exist. The vase created by us will reach room temperature in 8-9 hours, but we won’t see this)
34. Here, similar to our vase, are already lying on the stove lid. Diverse, beautiful, one might say - each one is unique in its own way. Pay attention to the round things on the bottoms of the vases - these are the remains of those things that were cut off in photo No. 32. In order to remove them, Egor later goes to another workshop, where everything is removed and cleaned by grinding. The vase is ready!
35. Broken pots that were in electric ovens, which became unusable due to the fact that the electricity in the building was cut off and everything was broken.
36. On the shelves are displayed various figures and products that were created here.
37. Cars, for example =)
A very cool workshop and Egor is an excellent master who loves his job, educates others and is always happy to help. Contact him, every week he leads excursions to his workshop on Okhta, and together with you he will create something interesting as a souvenir that you will take home.